There were a lot of recipes on the docket for today. Yesterday, we prepped for today by making four different kinds of ganache that would be used as a base for making truffles today. For those who don't know what ganache is, it's simply a mixture of melted chocolate and cream, which usually includes sugar or corn syrup, and sometimes the addition of butter. The cream prevents the chocolate from firming up too much, yet it is still firm enough to mold into whatever shape you desire your final product to hold. In the case of truffles, all you are doing is making small, bite-size balls, perfect for one bite munching.
We were working on four types of truffles for today: first, a traditional chocolate truffle that was mocha flavored, a second dark chocolate truffle, flavored with honey, then two white chocolate truffles, one which included candied orange rinds and Cointreau liqueur, and another that was flavored with coconut.
There is really nothing difficult about making truffles. The process of making good, homemade chocolates has been completely demystified for me now. It's quite simple. As I mentioned, you have to start with ganache, and our instructor gave us the "never-fail" formula for making ganache. If you follow this technique, you'll have perfect ganache every time.
1. You always put the sugar or sweetener in with the cream, and then bring it to a boil. He uses a microwave for this task, which simplifies things. If there is a desired flavor you hope to impart to the finished truffle, here is where any infusion of flavor occurs, e.g. vanilla beans, coffee, tea, cinnamon, or any other spices.
2. Grind up the chocolate in a food processor into small pieces. Cover the chocolate with the hot cream mixture, and let sit for a minute. After the minute has passed, blend with the food processor to create the best emulsion possible.
3. Soft butter is added, if the recipe calls for it. "Very mushy butter," according to our instructor. He said this was absolutely vital for a successful ganache. The butter looked like it had been left out on the counter on an 80-degree day--almost on the verge of melting completely.
4. If using liqueur for flavoring is desired, add it at the very end.
5. Set aside to firm up, preferably overnight.
In the morning, make your truffles.
The ganache wasn't refrigerated, so it was still relatively pliable. I've always thought that you made truffles by using refrigerated ganache, and molding a round shape with a melon baller or similar tool. What we did instead was to use a piping bag to form small round mounds. We let these sit awhile in a cool spot to firm up a bit, and when they had firmed up just a little bit, each mound was quickly shaped into a ball. At this point, you have to "enrobe" the truffle in a layer of tempered chocolate. This process is repeated, so that you end up with a firm shell on the outside. You want a nice "bite" on the outside, which gives way to the soft, smooth ganache inside.
We were a truffle-making factory today. It's kind of boring, repetitive work, so I don't think I'd enjoy making chocolates like this for a living. I imagine I'll be making them for holidays and the like, however, since they were INCREDIBLE! The orange truffle tasted absolutely fantastic, and was my favorite. The mocha truffle was quite good as well, and the coconut was interesting, though not my favorite. All in all, I think it'd be hard to beat these chocolates. The fact is that if you are using the best ingredients, and follow tried and true techniques for making chocolates, any homemade truffles will be just as good, and most likely better, than the best store bought ones you can find. The advantage: freshness. All of the chocolates we made were just so darn tasty! I know the kind of chocolate they use at the CIA, and I plan to buy some and try my hand at chocolates, as soon as the weather cools a bit. I got excited thinking about the possibilities: I plan on using some raspberry port from Leelenau Cellars to make some raspberry truffles, with both white and dark chocolate. I may even buy some pre-made chocolate shells, fill them with that port, then enrobe them with chocolate, so that when you bite into it, you get a surprising burst of liquid raspberry yumminess. That'd be fun! I think cinnamon and chocolate go very well together, so I'll experiment with that. And of course some mint truffles should be on any list of chocolates to be made. Grand Marnier tossed in with a little chocolate would be tasty too. The possibilities are endless, and talk about a fun way to spend an afternoon!
Besides the round truffles, we made some square shaped truffles. I think these could actually more accurately be called bon-bons, but I'm not sure about that. We used a special dipping fork to dip these into melted chocolate, and then used the three prongs of the fork to make a distinctive mark on top. One of the best things about this class was learning the "tools of the trade." Much like the cane bread bowls we learned about in baking, here in this one day study of chocolate, we learned what tools chocolatiers use in their craft. The distinctive mark I'm talking about is what we've always seen on top of "fancy" chocolates: the smooth, wave-like texture that gives them that little extra something to make them more appealing. Who knew it was all done with a little fork. Having that little fork is all one needs to make chocolates that would cause people to say, "you made those at home?" One of those forks is on my shopping list.
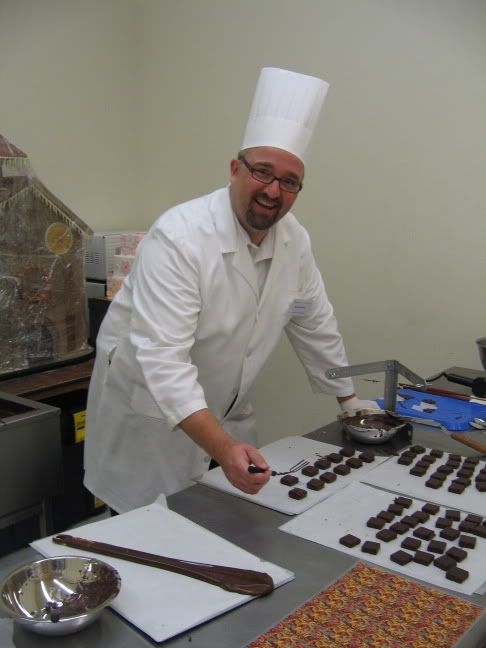 Here I am in the chocolate room, trying my hand making those truffles. Like the hat? I have a big ole head, and I could barely fit into the thing without it ripping. I had more trouble with that darn hat all weeklong. Pain in the rear. In that picture, it was stuck together with tape. I was constantly fiddling with the thing. I think it lent a little humor to my classmates.
In the picture, you can also see a multicolored sheet sitting on the counter. The chef showed us what that's for. That design is on a transfer sheet, and the designs are "painted" in cocoa butter. With these square chocolates, you can transfer the designs from the sheet right onto the chocolates. You simply cut out the right size shape from the sheet, place it on top of the chocolate right after it's come out of the dipping chocolate, push down for a second with an offset spatula, and let it set up. Once the chocolate has cooled, you simply pull the sheet off, and the cocoa butter remains, easily producing chocolates that look incredible. You could use some nasty Meijer brand chocolate chips, melt them up, and if you put a fancy pants cocoa butter design on top of your candies, people would be oohing and ahhing. (Until they took a bite...). Once again, the techniques of the professional chocolatier demystified. Apparently you can even create your own designs and have companies make the transfer sheets for you. I think I could have a lot of fun with that!
I'm going to be having fun with chocolates. I've been researching this more since I got back, and I believe that making nougat is quite simple too. We sampled some of the other class's chocolate covered nougats, and they were really quite good. There were fruit creams, and mint filled chocolates as well. I think for Christmas, I'll be giving out boxes of homemade chocolates. I'll probably order some fun chocolate boxes, and make them look quite presentable. Who knows--maybe I can create a little sideline business. Or maybe not. I did say it felt like factory work. I'll stick with gifts for now.
Besides the chocolate candies, we made several chocolaty desserts. My team made the chocolate soufflé cake, which I was quite happy about. For most of the week, there seemed to always be another team that was making the one thing I would have most liked to make that day. But on our last day, I was finally making the one thing that I wanted to make. I've never made a soufflé cake before, so I was happy to have a go at it. It went together quite easily. Whip up the egg yolks with part of the sugar, and melt the chocolate and butter together, then fold all of that together. When everything's ready to go, you whip up the egg whites with the rest of the sugar, and then as soon as the whites reach the medium peak stage, fold the whites into the rest of the batter. Mix it just enough to incorporate, pop 'em in the pans, then into the oven, and you're good to go. That makes a darn tasty cake. A little bit of airiness and lightness left in it from the whipped eggs, but all in all, a totally chocolate experience.
The flourless chocolate cake had even more of an intense chocolate kick. Nothing but eggs, chocolate and butter. That's a recipe for happiness in any languag.! According to the chef, the recipe can take up to 4 oz of any liquid added to the batter and still be OK. I know I'll be making this one again and experimenting with different flavorings. The team that made this went with what would have been my first choice, and added a raspberry puree, along with some Chambord. Incredible.
The final dessert of the day was a chocolate ganache tart. This had to have been the richest dessert of the week. Take one pie crust, fill it with any variety of chocolate ganache you'd like, and there you have dessert. Very, very rich, and very, very tasty. Chef Durfee said he preferred making this in small, 50¢ size tarts. I'd have to agree with him. It's more like candy than a pie, and if you had a nice balance between crust and filling, I think it would be more appealing. I'll try my hand at that, as soon as I get my hands on some small tart pans.
By the end of the day, nearly all of us were chocolated out, if that's possible. We were surrounded by chocolate all day long, and by the end, it was just a bit overwhelming. (Imagine that!). I really enjoyed the day, however. Everyone likes chocolate, and it's always considered the most decadent of desserts. It was fun to learn more about chocolate than I knew before. Part of the day was spent in a lecture learning about the history of cacao, and how it was turned into chocolate. I never knew that cacao beans are the seeds of a tropical fruit, which looks quite a bit like a papaya. The process involves allowing the fruit surrounding the seeds to ferment. When you cut a cacao fruit open, it's flesh and seeds are both white. The fermentation process causes the seeds to turn brown, which gives us the distinctive chocolate color, and part of the flavor. (Yet another three cheers for the glories of fermentation. So many of my favorite foods are the result of fermentation: bread, cheese, wine, beer, hard cider (heck...all alcohol), and now chocolate! Giddy up!) After the seeds have fermented for awhile, they are pulled from the flesh and laid out in the sun to dry for several weeks. After that, they're stuffed into burlap bags, then shipped to the chocolate factories to be roasted and processed into chocolate. What everyone finds remarkable about the history of chocolate is how accidental it all must have been. Who thought of taking the seeds of an unpalatable plant, allow them to sit and ferment for awhile, then be roasted for just the right amount of time, followed by an elaborate grinding process? It's amazing that we discovered it at all. After you've done all of that, what you're left with is a very bitter concoction, which is how the Mayans drank it. Sugar wasn't added until the Europeans came along. It's perhaps the happiest of accidents in the culinary world, and our lives are decidedly the better for it.
After dinner on Friday, we came back to the kitchen one last time. We evaluated our desserts from the day, and sampled them again. Cameras were pulled out, and emails were exchanged, with promises of staying in touch, which of course won't happen. The chef said a few words, and then passed out our diplomas. (Yes, I received a diploma for the week--kind of fun, but it's not going up on the wall!). People talked about whether or not they'd consider going into a career in pastry or whether it would just always be a hobby for them. People promised to share a few of their favorite recipes when they returned home, and we all grabbed bags of sourdough starter to take with us. As for me, I had the time of my life this past week. I would love to go back, and spend a year in school there, but know it's not practical. It was incredibly stimulating and exciting for me, to get a glimmer of what it might be like to be in school to study one of my passions. This is one of the best in the country, and to study from giants in the field would be truly exceptional.
I said my goodbyes, took one last look at the now empty kitchens, and reflected on the events of the week. As I hung up my lab coat, and tossed my now bedraggled hat into the trash, I wondered if one day I'd be back. Leaving the kitchen a final time, I walked down the stairs, and the spark of a dream to return was lit within me. I want to gp back. Today, as I think about last week, I want to study to become a pastry chef, and I want to do it at the CIA in Napa Valley. It's just a dream, I know. I don't necessarily think it will come to fruition, nor do I necessarily think it's the most prudent direction I can take for my life. But life is to be lived, and to be bored with life is a recipe for stagnation. This week has been the most exciting and fun week I've had in ages. It's doing something I love, and have always loved. Now the fun begins--imagining and dreaming what it might be like to go back, and to see if it's practical. I'm already thinking of ways to make it happen. It may never happen, but even dreaming about something is fuel for living life to the fullest. Goals and dreams are what keep us moving, and right now, well...I'm dreaming big.


3 comments:
Would it be presuming too much to say I am looking forward to making some truffles with you?
Would it be presuming too much to say I am looking forward to eating some truffles with you?
Presume away...
Here's the plan: Alison and I will have a truffle making party, and ship a box to North Carolina.
Giddy up!!!
Post a Comment